Today’s topic comes from reddit:
“I want to get into VJing, what programs are the best when it comes to creating the actual visuals? I’ve heard about Resolume, but as far as I have understood that only works for arranging the visuals during live shows and such. Any tips?”
There are a lot of options out there for VJing and for creating visuals. It can be a little overwhelming and sometimes “helpful advice” isn’t really that helpful.
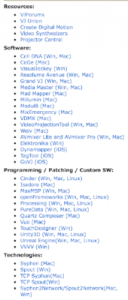
“On the sidebar there’s a list of software.”
“If you try all the software, you’ll find what works for you”
This advice just sends you deeper down a rabbit hole and doesn’t help you get started. It just leaves you with more questions, especially when there are so many options.
“I do not know which of the software is for designing the visuals, and which is for arranging them live.”
So today we’re going to focus on one specific thing. We’re going to create your first visual in Resolume. No additional software or plugins required.
Who Is This VJ Tutorial For?
This is for someone who has never used Resolume before and who has never used any motion graphics software such as After Effects or Cinema 4D. If you’re interested in learning to VJ and don’t know where to start, you’re in the right place.
This is not for advanced users, which means you don’t need programming (Processing) or patching experience.
This is not a comprehensive walkthrough of Resolume either. We’re focusing on one specific thing, making a simple visual in Resolume.
Why Start With Resolume?
While Resolume is primarily designed for performing live with pre made video clips and loops, it is capable of creating visuals on the fly using the built in effects and FFGL (Free Frame Graphics Library) sources.
This means you can create and arrange your visuals in Resolume. All without needing any additional software and without long rendering times.
Another benefit to starting with Resolume is you get immediate feedback. You can start tweaking effects and get results instantly.
Baby Steps, The Key to Learning Anything
The ultimate goal of this tutorial is to get you to started with Resolume.
The keyword here is start. You can download Resolume and try this today. Stop researching, and start doing.
For this reason the visual you’ll create is intentionally simple and easy. You will not be creating a complex 3D masterpiece that will be on stage at Ultra.
We have a tendency to overcomplicate things and to endlessly research. You’ll learn a lot faster if you get your hands dirty. Now lets get started.
Making a Simple Visual in Resolume (Step by Step)
Here is the visual we’re going to be making:
Remember, this is meant to be simple so you can start and get a quick win. In fact you can create this in less than 5 minutes.
1. Download Resolume (these links don’t have the demo footage included so the download is smaller):
Mac (click to start download)
PC (click to start download)
Resolume has a free demo with all the features unlocked. You can use it as long as you like. The only catch is every couple minutes a watermark will display on screen and a robotic voice will say “Resolume Avenue”.
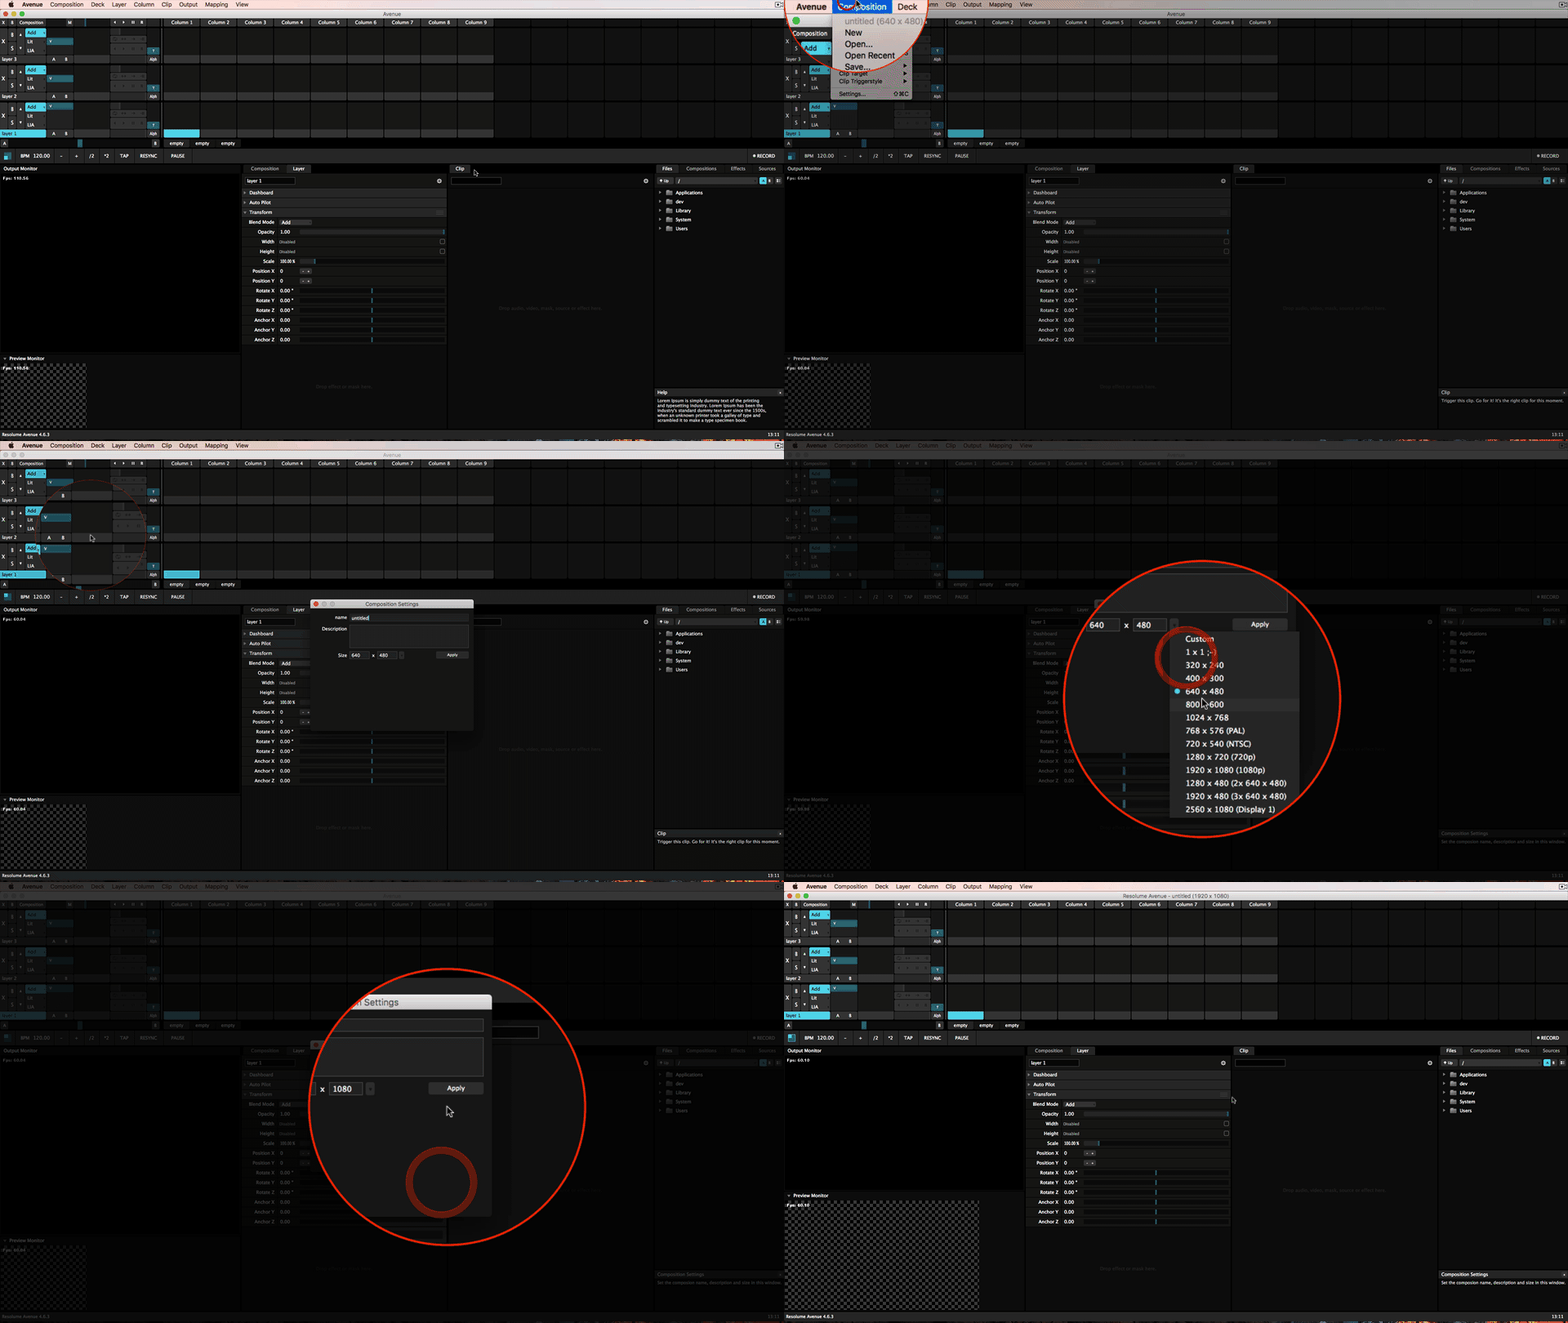
2. Set your project dimensions (HD)
- Go to “Settings” (from the menu bar, “Composition” –> “Settings”)
- Change the “Size” to 1920 x 1080 and click “Apply”. There’s also an arrow beside the size box with preset dimension sizes
- You can choose a smaller size if you have a slower computer as well.
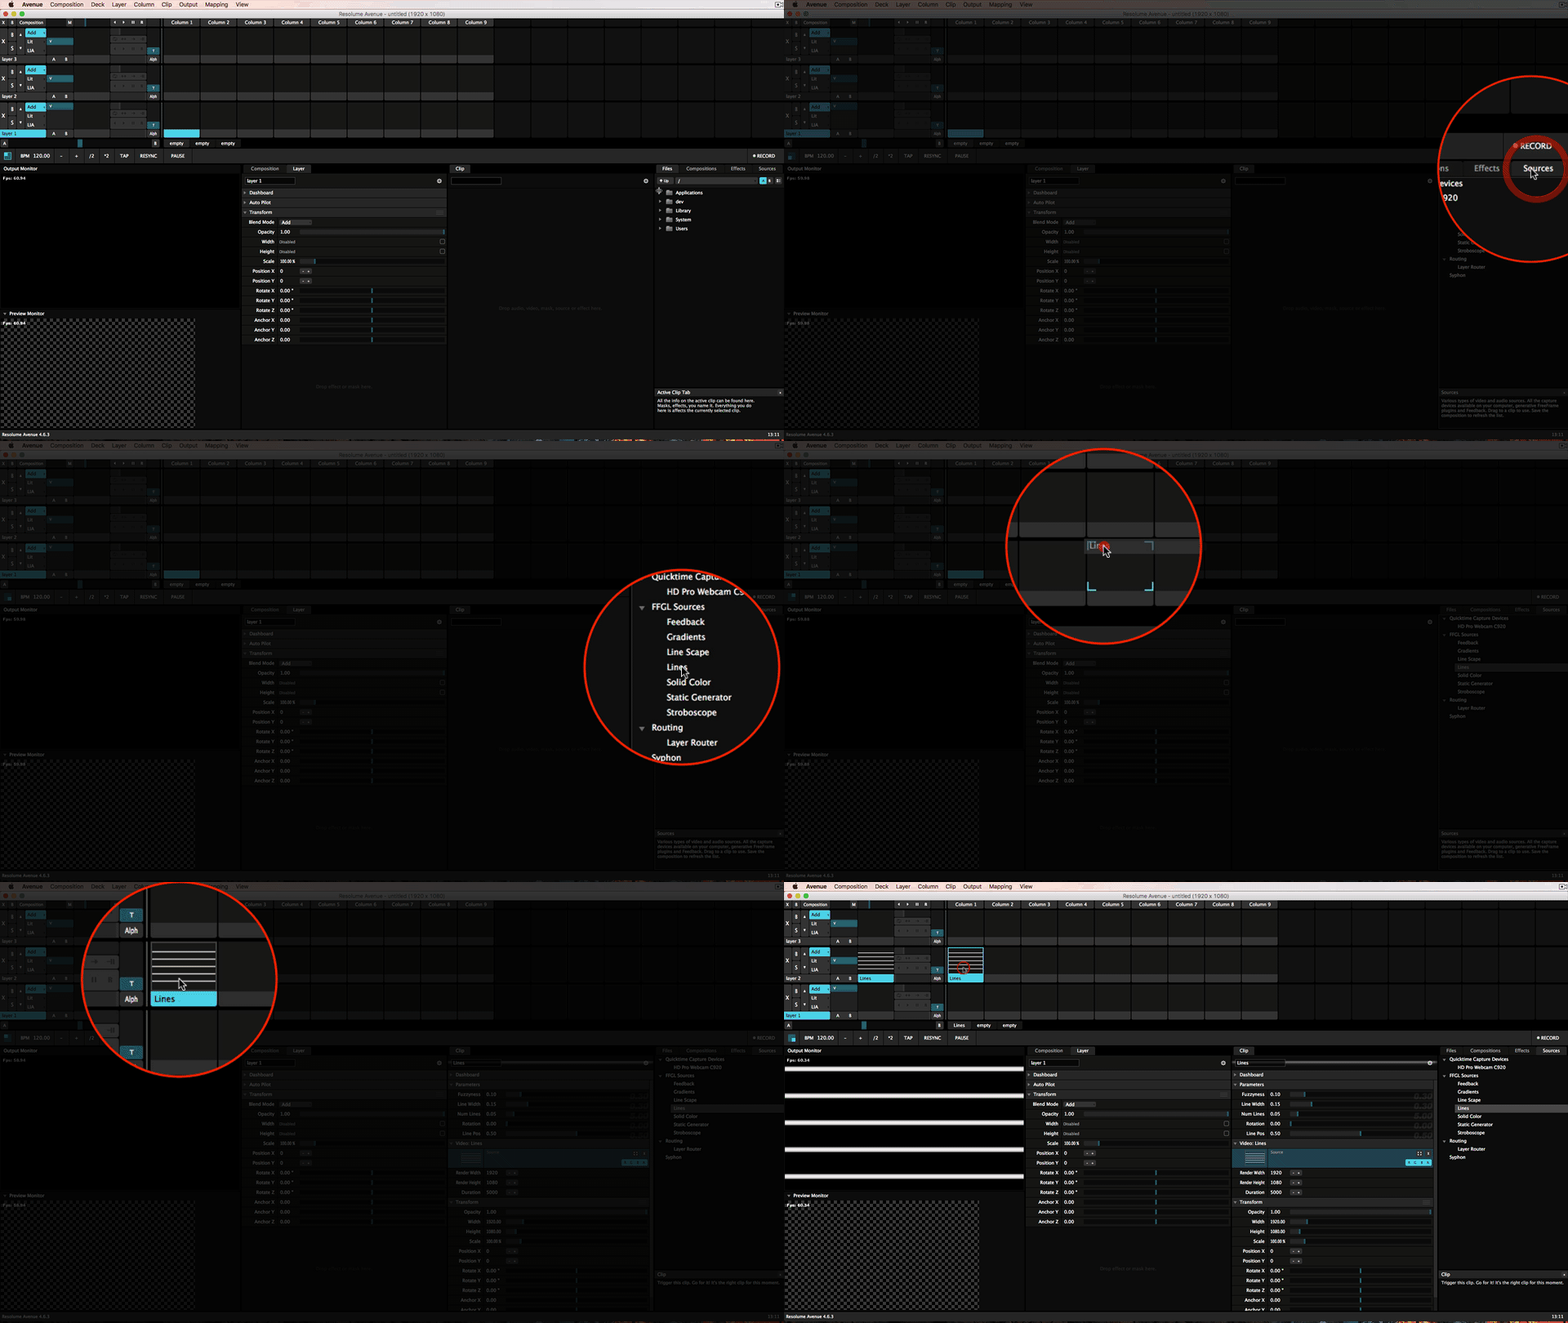
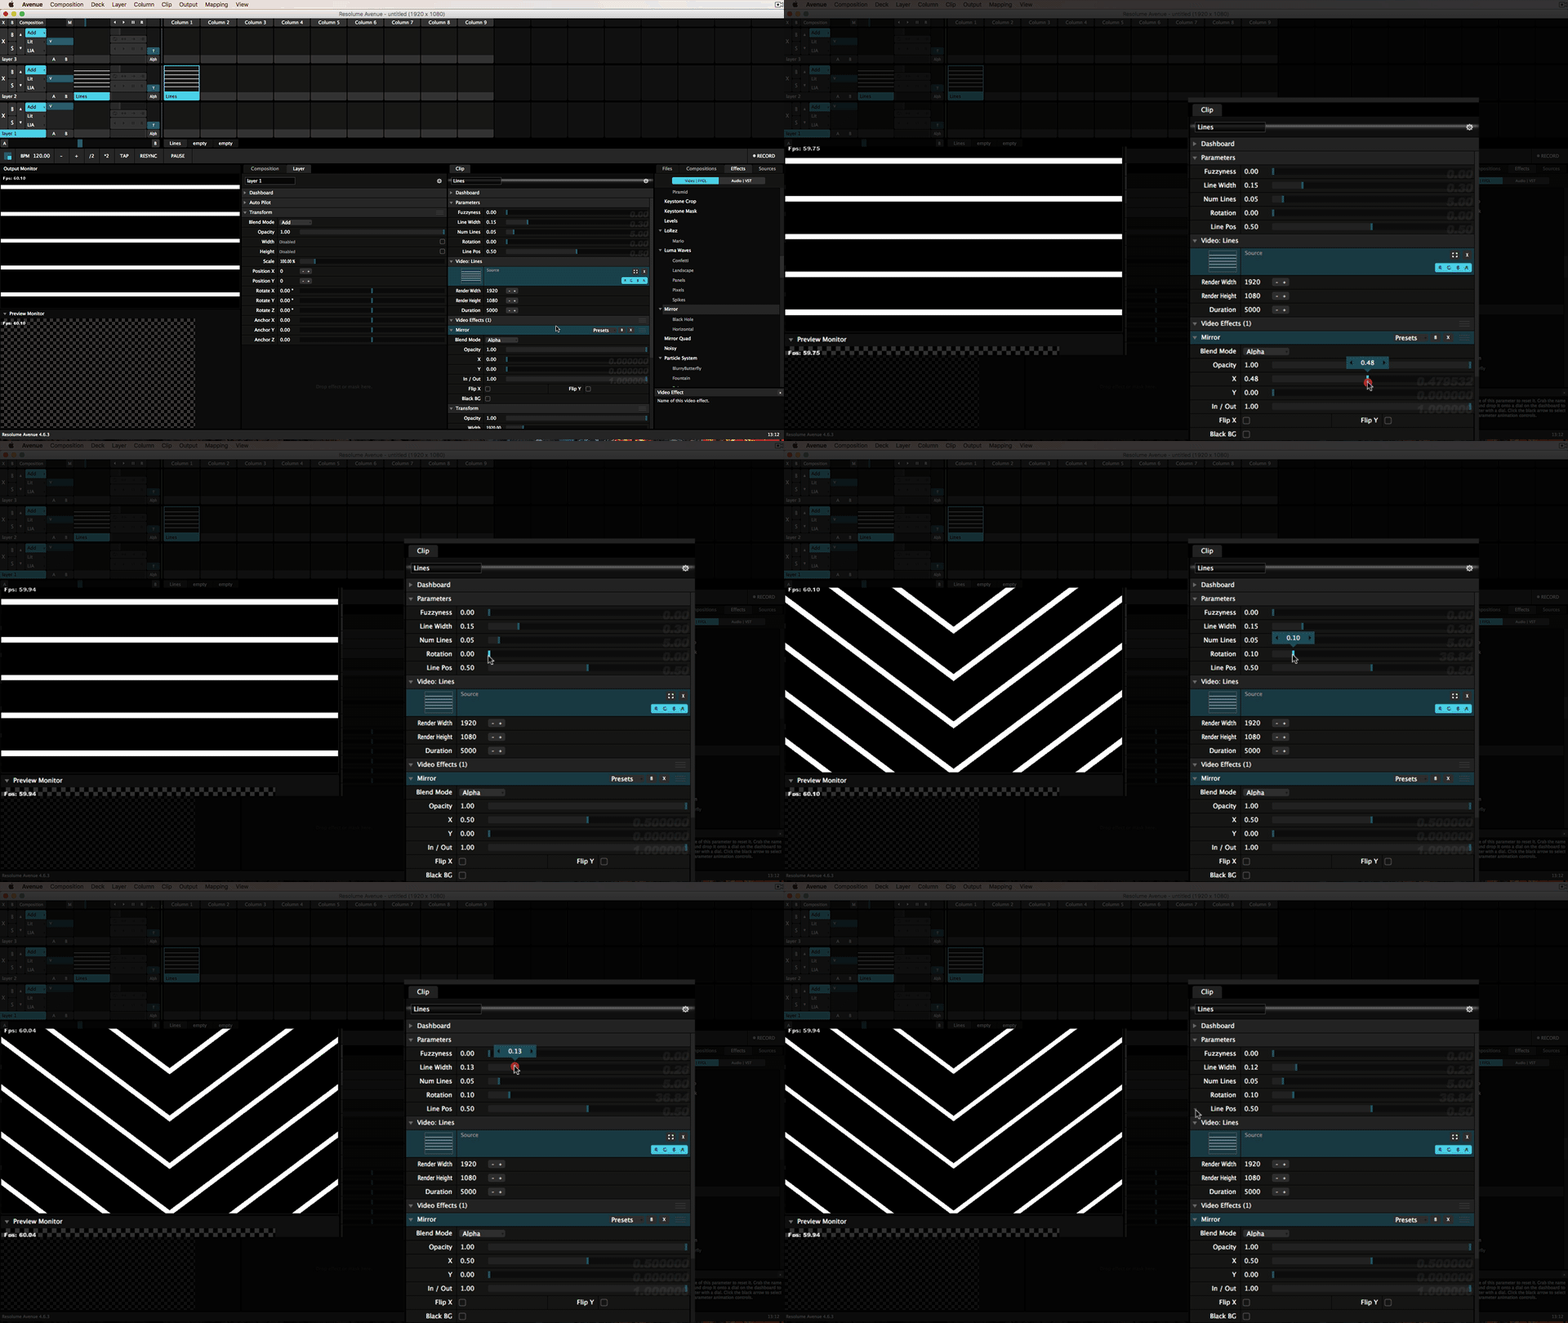
3. Go to Sources and drag “Lines” onto an empty clip
- Click on the clip to trigger/play it
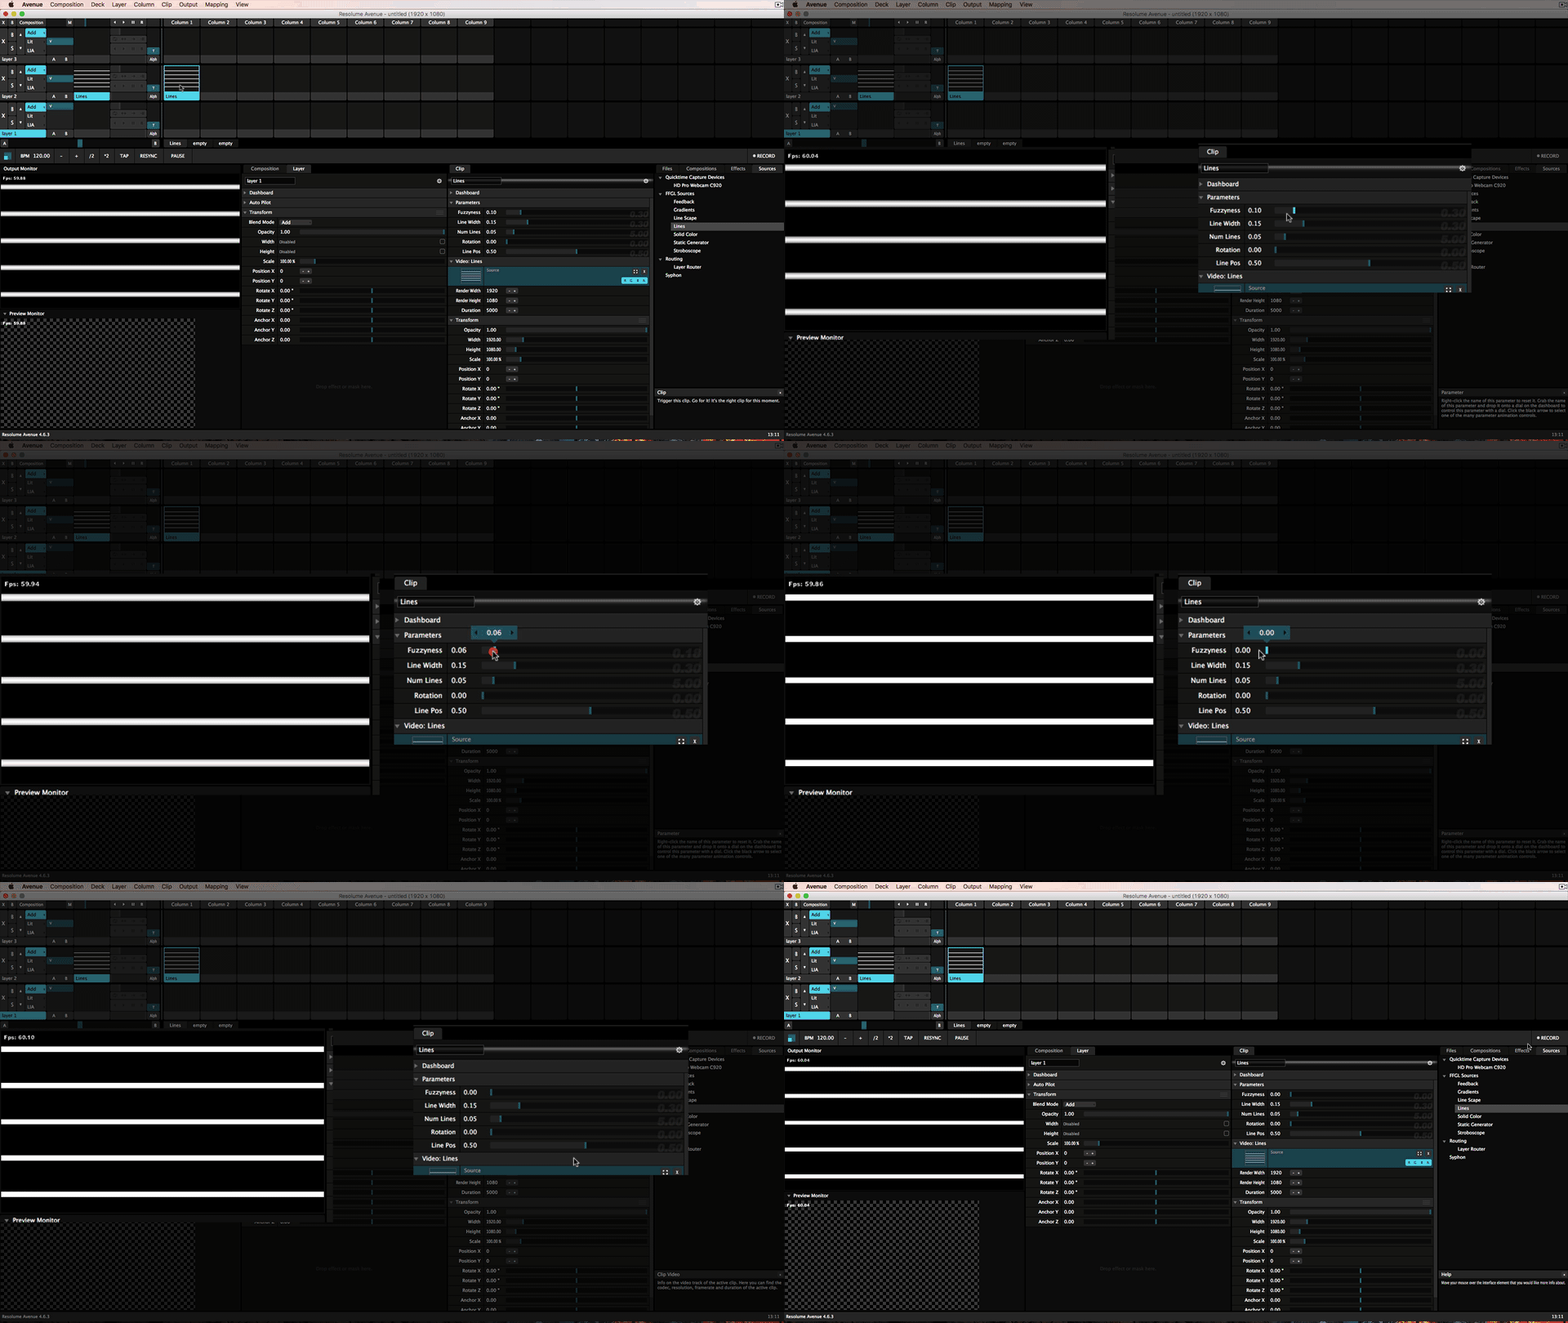
4. Customize the look using the “Clip Panel”
- Set the “Fuzziness” to 0. This will make the lines look nice and sharp.
5. Load an the mirror effect
- Go to the “Effects” tab in the browser window on the right
- Scroll down to “Mirror”, drag it onto the “Clip Panel”
6. Adjust the Effect Parameters
- Go to the “Mirror” effect in the clip panel
- Set the “X” parameter to 0.50
- Set the “Rotation” for the line to 0.10
- This will create the arrow effect
7. Make it move
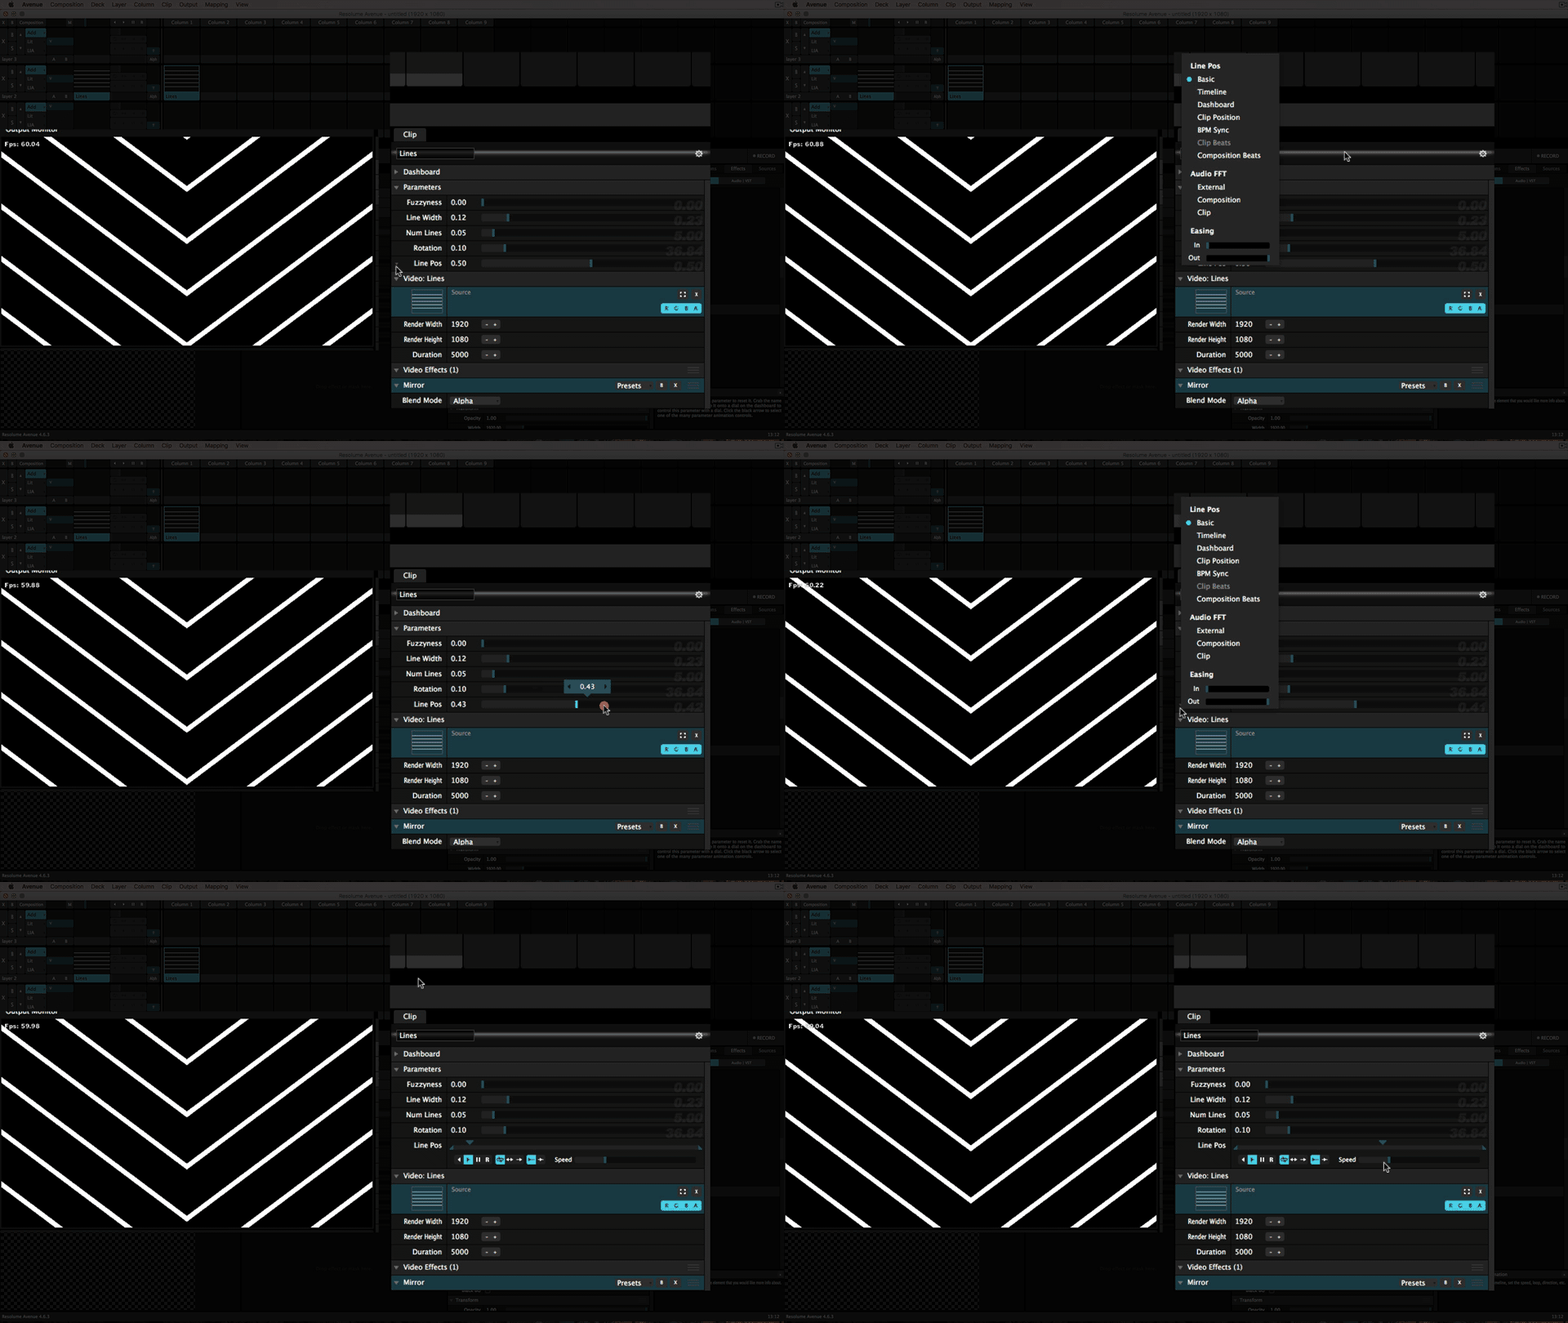
- Move your mouse to the left of the “Line Pos” parameter, you’ll see small arrow, click it
- This will reveal the “animation controls”
- Choose “Timeline” from the menu
- Now the Line Pos will start moving and continue to loop until the clip is stopped
- You can change how fast/slow the lines move by adjusting the “Speed” slider
8. Victory Dance Because You Just Made Your First Visual
Challenge: Experiment With One Other Setting
Now that you’ve created your first visual, challenge yourself and try animating one and only one additional parameter. A good starting point may be the “Line Width” or the “Num of Lines” parameter. Don’t forget to save your work!
Finally, do not make the mistake of trying to be perfect or put pressure on yourself to make some amazing, unique, omg one of a kind visuals. You’re already a step ahead by starting.
More VJ Tutorials
Resolume VJ Tutorial: Beginner VJ Loops Using Duplicate Effects


muito bom